
Topic 03: Getting Started with Processing
Processing is a free, Open Source programming language based on Java. Processing can be downloaded and installed on several different operating systems. Processing includes a Processing Development Environment (PDE) which is an Integrated Development Environment (IDE) in which code can be written and from which programs can be run. The PDE includes an editor for entering code and below it a console area for displaying text output from a program (a sketch).

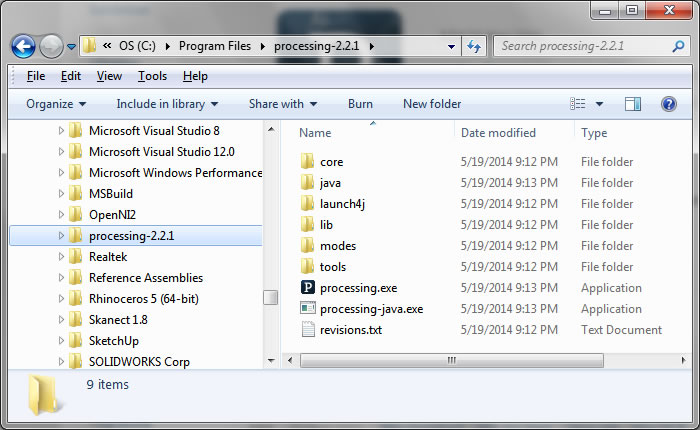
When Processing is downloaded for the Windows operating system, it comes as a .zip file. There is no install required, the folder structure is simply extracted from the zip file in the appropriate structure with all the folders and files ready to use. This zip file should be extracted to the Program Files directory or dragged to the Program Files folder after it is extracted. On my laptop, I have put it in the folder 'C:\Program Files\processing-2.2.1' to indicate the version number that I downloaded. Once in the correct folder, you can drag a shortcut of the Processing executable file 'processing.exe' to the desktop to create an easily accessible shortcut.
When Processing is run for the first time, it creates a Processing folder and a subfolders structure in the My Documents folder. It is into these folders that any new Processing programs (sketches) should be saved. This is referred to as the sketchbook.
There are several excellent reference books available for Processing, including 'Processing: A programming handbook for Visual Designers and Artist' and 'The Nature of Code'. All the examples used in these books are also available to download from these sites. If these examples are downloaded, they come as a zip file. The examples in the zip files should also be extracted to the Processing folder under My Documents.
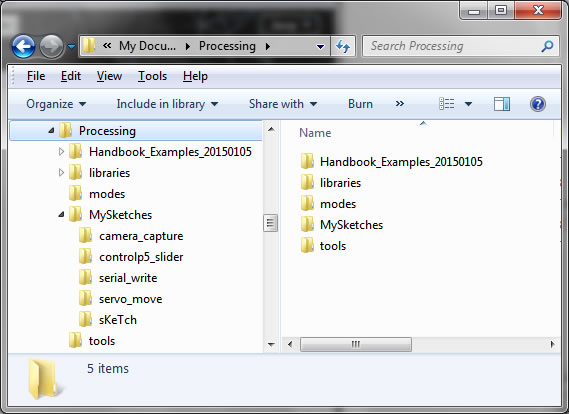
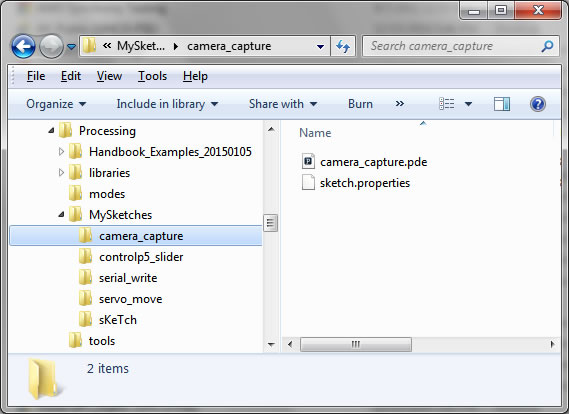
Once the examples are extracted, this folder will contain many example sketches. The My Documents>Processing folder structure also contains several Libraries that are included as a standard part of Processing. Additional libraries can be installed to increase the capabilities of the 'standard' Processing code. This can be done from the menu options 'Sketch>Import Library...>Add Library. This will open the 'Contribution Manager' from which additional libraries can be selected and installed. When these libraries are installed, Processing automatially installs the downloaded libraries in the Processiong folders. SOme additional libraries are installed in 'My Documents>Processing>Libraries' folder. In addition, any new Processing sketches that are written or downloaded should be saved in this Processing sub folder. It is good practice to create a new sub-folder called, MySketches, for example, into which any new sketches can be saved. Sketches are saved with the extension '.pde'. When a new sketch is saved from the PDE, the PDE creates a new folder with the same name as the file name. Only one sketch should be saved per folder. Processing requires each sketch to be in its own folder of the same name. Use filenames without spaces when saving a new Processing sketch.
When a sketch is loaded into the PDE and run, normally, if the sketch includes any graphics or text to display, a 'canvas' will be created. Shown below is the PDE with a sketch loaded and running. Below that is the canvas that was opened when the sketch was run.
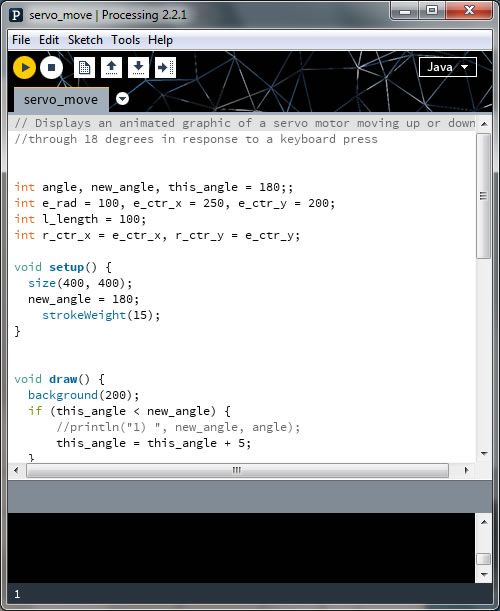
This canvas is a new, separate window (the canvas) which contains the graphics output from the instructions in the sketch. The canvas has the coordinate scheme on which graphics are drawn and displayed. Below is the canvas showing the graphic from the sketch above. The actual code for this sketch is provided below. Note, this Processing code actually runs live on this web page, so follow the instructions on the canvass below to see it in action. This is accomplished through using the processing P5jsMode add on to Processing. The code for P5jsMode is a little different from Processing and this is a more advanced topic, so we won't get into the details of that here, but all the information on this is available at http://p5js.org/.
Here below is the sketch. This can be copied and pasted into the Processing editor and run to see what it does and how it works. The lines that start with '//' are comments and are not executed. Some parts of the code are also 'commented out' so they do not execute. This is because this code includes a number of commands that will be discussed later in Topic 08. For now, just accept that the lines following the '//' characters are not executed. The comments are an especially important part of a program because they explain what is happening. Comments should be used liberally so that you can remind yourself later what the code does and so that if others use your code, they can follow it better from the comments. Layout and spacing is also very helpful to understand the flow of a program. Spaces are free in code, so use them liberally to organize you code so it is easy to follow.
Processing has two 'standard' functions. They are setup() and draw(). setup() is executed once when the code is first run. This function is intended to do what its name implies, namely set some things up. The second function, draw(), is executed over an over again. This can be thought of as a continuous loop where everything between the curly brackets '{' and '}' of the draw() function is executed over and over again.
This code uses a sophisticated function to check to see if a key is pressed on the keyboard while the code is running. In this case, the key press is read from the keyPressed() function at the end of the code. This function is called automatically by the draw() function, so no specific statement is needed to call the keyPressed() function. Just the act of including the keyPressed() function in the sketch means that it is called at each loop through the draw() function. So, think of it as simply being called each time to check to see if a key on the keyboard is pressed. If it is, then this function checks to see if the key was the 'u' or the 'd' key (for 'up' or 'down'). If it was, then a new angle is set and control is returned to the draw() function to resume the loop.
// Displays an animated graphic of a servo motor moving up or down
// through 180 degrees in response to a keyboard press of the 'u' or 'd' keys.
// The code to send serial commands to an Arduino sketch to move a servo motor
// are commented out, so this will run without an Arduino microcontroller attached.

//import processing.serial.*;  // import the serial library

// define some variables for the graphic and the movements
int new_angle, this_angle, temp_angle;
int e_rad = 100, e_ctr_x = 250, e_ctr_y = 200;
int l_length = 100;
int r_ctr_x = e_ctr_x, r_ctr_y = e_ctr_y;
color angle_color = 200;

//Serial port;   // define a port of the Serial type

void setup() {
  	size(400, 400);  // set the canvas size
  	new_angle = 90;
  	this_angle = 90;
  	strokeWeight(15);  // for the graphics objects
  	//port = new Serial(this, "COM3", 9600);   // connect to the Arduino serial port
}


void draw() {
 	background(angle_color, 0, 255);  // clear the canvas
  	if (this_angle < new_angle) {
      		//println("1) ", new_angle, angle);
      		this_angle = this_angle + 5;
  	}
  	if (this_angle > new_angle) {
       	 	//println("2) ", new_angle, angle);
        	this_angle = this_angle - 5;
  	}
  	angle_color = int((float(this_angle)/180) * 255); // this allows the colors to change with movement
  	fill(255, angle_color, 0);
  	ellipse(e_ctr_x, e_ctr_y, e_rad, e_rad);
  	// calculate the outer point of the lever arm
  	int x2 = (int)(cos(radians(this_angle)) * l_length + e_ctr_x);
  	int y2 = (int)(sin(radians(this_angle)) * l_length + e_ctr_y);
  	// println(x2, y2);
  	line(e_ctr_x, e_ctr_y, x2, y2);

  	// use a conditional statement to write to the serial port so that
  	// we are writing to the serial port only when the angle changes
  	if (temp_angle != this_angle) {
    		//port.write(this_angle);  // write the servo angle to the serial port
    		temp_angle = this_angle;
    		//println(this_angle);
	}

}

// function to check for a keyboard key press during the draw loop
void keyPressed(){
  	switch(key) {
  		case 'd':
      		new_angle = 0;
      		break;
    	case 'u':
      		new_angle = 180;
      		break;
  	}
  //println(new_angle);
}
In Topic 08 we will see how this above sketch written in the Processing programming language can be used to control the movement of a servo motor attached to an Arduino Uno microcontroller. The simple sketch shown here generates an image of an icon to represent the servo motor and by pressing the 'u' key on the keyboard (for 'up') or the 'd' key on the keyboard (for 'down') the Processing sketch will communicate with the Arduino Uno microcontroller via the serial port to move the servo motor while at the same time animating the image of the servo motor to show the movement of the actual servo motor on the computer screen.
There are many excellent resources on the Processing web site which provide instruction on how to use the PDE and how to program in Processing. A series of excellent tutorials provide a good starting point to learn various aspects of the capabilities of Processing. There are also many example sketches that provide excellent resources for learning Processing.
Go to Topic 04