Adrian Glasser – Land of Iron volunteer
The historic photos used in this blog and in the animations were kindly supplied by Charles Moisley (Robin Lidster Collection), Beck Isle Museum, Ryedale Folk Museum and Rosedale History Society.
To view the Time Sliders (the subject matter of this blog), please scroll to the end of this web page.
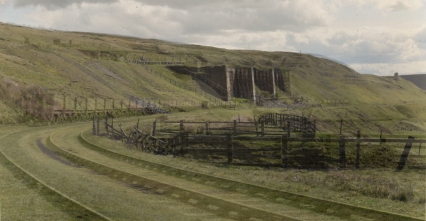
Tom and I got talking in the Normanby Room at the Whitby museum after he had delivered a wonderful lecture on the Land of Iron project. We were at the monthly meeting of the Whitby Literary and Philosophical Society, an organization founded in 1823 dating back to before the existence of Rosedale railway and ironstone mining industry that was underway near Rosedale around the 1860s, the subject of Tom’s informative talk. The Tom of whom I write is Tom Mutton, the Land of Iron Programme Manager. Tom has, in his PowerPoint presentation, an amazing collection of original scanned black and white and recent digital photographs of the landmark historic sites and artifacts from around the areas of the Rosedale ironstone mining industry. Many of the recent, gorgeous photographs have been taken by Tom himself. Our conversation centered on a transition or a morph that Tom had carefully set up in his PowerPoint presentation of an old photograph of the Rosedale ironstone roasting kiln slowly merging into a photograph showing the remnants of that same structure as seen today, the modern photograph having been taken from exactly the same spot as the original. I remarked on how difficult it must have been for Tom to get the recent photograph from exactly the same location as the original. Tom explained that, in fact, he’d had to go back to the site three times to retake the photo to get the new and the old photos to line up exactly. He showed me how he’d had to load the photos into Photoshop to crop and warp the images a little to get the two photos to superimpose correctly and how he’d had to brush edit the old photo a little and set up the transition between the two slides so that his animation worked effectively in PowerPoint. Clearly, this was a labour of love for Tom as he’d obviously invested considerable time and effort in this.
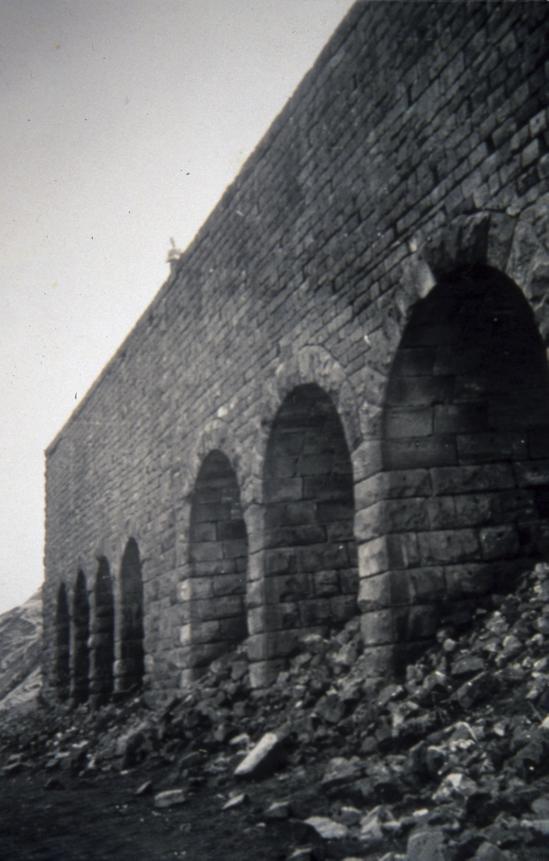
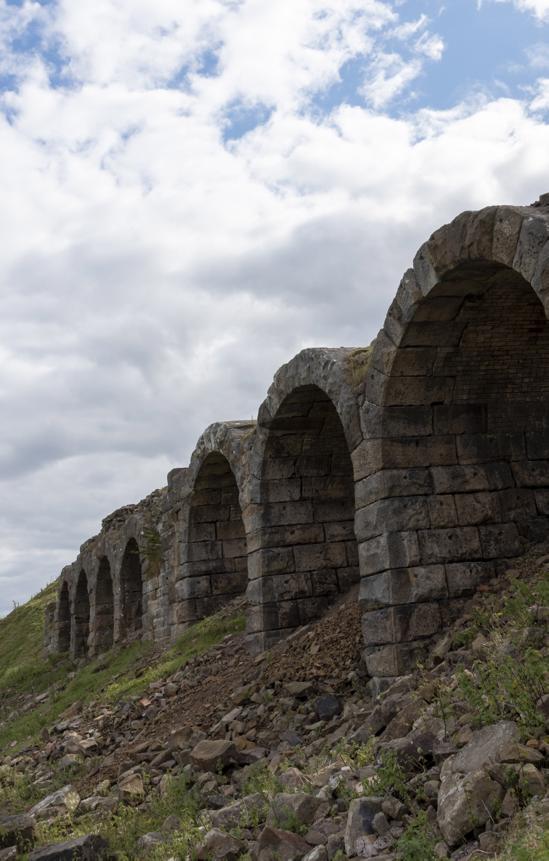
On the left is the scanned original black and white photo of the Rosedale ironstone roasting kiln and on the right is Tom’s recent photo of the remnants from exactly the same vantage point.
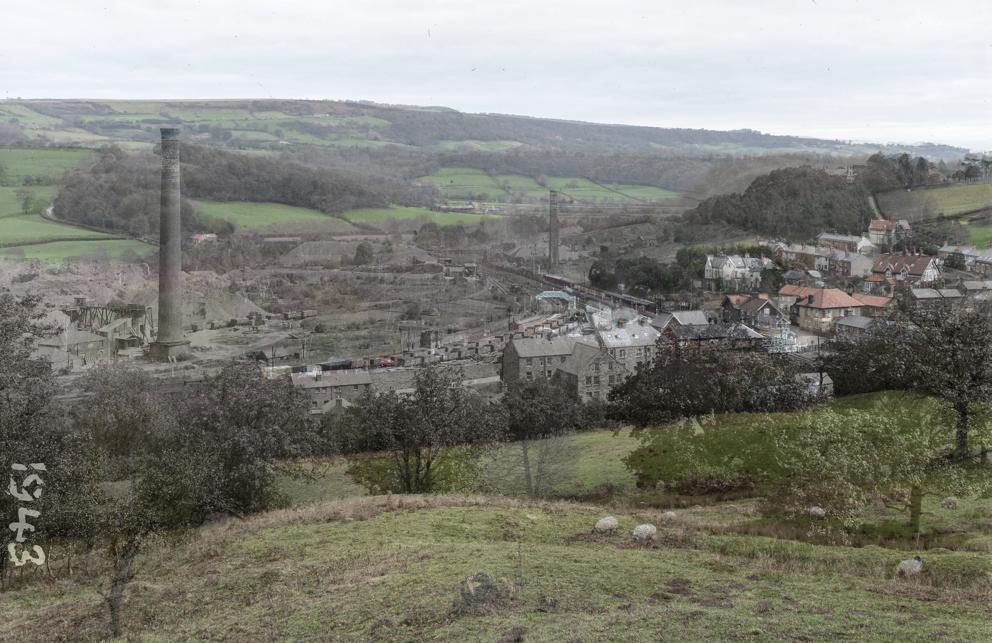
The striking juxtaposition between what was happening in the dales and moors around Rosedale at the tail end of the First Industrial Revolution where railways, coal powered steam engines and ironstone roasting kilns, massive Victorian mining structures and raw, industrial scale mining activities, some of the ruins of which still dot the beautiful landscape today, and the technological capabilities we now have at our fingertips through computers, the internet, robotics, 3D printers, artificial intelligence and so much more, is a source of constant fascination to me. We are in the midst of what Klaus Schwab, the Founder and Executive Chairman of the World Economic Forum has called the Fourth Industrial Revolution where the accessibility of technological developments are transforming our lives today and into the future. There is a massive Maker Movement of people and organizations redefining employment, business and industry to take advantage of the opportunities that are offered through recent technological advancements. The conversation that Tom and I were having after a 2018 meeting of the Whitby Literary and Philosophical Society that was founded during the First Industrial Revolution, about manipulation of digital images of structures that were built in the 1860s, was a Doctor Who-like moment.
Tom went on to say that what he really wanted was a user-controlled animation of the old and new photos with a slider bar that he could use in his slides or put on a web site and he proceeded to show me a dozen or more original and recent image pairs that he had collected of sites associated with the Land of Iron project. How instructive the new and old photographs are when seen side-by-side photographed from the same vantage point and how wonderful they would all be as animations transforming from then to now. As visitors enjoy walking or driving through the areas today, many may be completely unaware of or oblivious to the relics of filled-in railway bridges, mine entrances and other structures of the ironstone mining heritage that so shaped this landscape that lie nearby, underfoot, on the roadways and hillsides over which they pass. As a volunteer to the Land of Iron project, I’ve been fascinated to learn of the historical heritage, to walk the paths of the old railway tracks and to visit sites such as the Rosedale ironstone roasting kilns and the Warren Moors Chimney. Tom has also patiently listened while I’ve talked his ears off about the opportunities to integrate the wonderful technological capabilities so readily accessible to us in this Fourth Industrial Revolution and the Maker Movement into the Land of Iron project which dates back to the First Industrial Revolution and about the instructional and educational opportunities this integration could offer to visitors to the project. Imagine the enormous industrial challenges faced by those who built and worked the ironstone roasting kilns and railways and their amazing technological achievements in that bygone era and how astonished those who are pictured in so many of the old photographs would be at the technological developments of our modern world, the ready access to information we have on the internet and the technological tools like smart phones and computers that are so much a part of our lives.
I have some self-taught computer programming and image processing experience and one of the programming languages I have used is the free, open-source scripting language called ‘Processing’. It is a very visually oriented programming or coding language and is ideal for artists, is easy to learn and has extensive online tutorials. I thought I could create the animations that Tom was after using Processing, so I asked Tom to email me the two photographs he’d used in his PowerPoint animation so I could see what I could do.
Digital images are simply a collection of pixels. A pixel is a picture element that is represented by a number. Digital images are composed of a grid of pixels with values that represent the colours or brightness of the image. JPEG digital images (JPG) with which we are so familiar, are composed of three layers of pixels, one to represent each of red, green and blue, hence the name RGB images. The number representing the pixels in a JPG image usually range from 0-255. That is a range of 256 numbers (28 or two to the power of 8 or 2x2x2x2x2x2x2x2 or eight bits or one byte). Absolute black has a value of 0 and absolute white a value 255 and all the gray values from black to white increase from 0 to 255. Because a digital image is just a set of numbers, it’s relatively easy to do simple arithmetic manipulations or computations with or on digital images such as adding, subtracting, multiplying or dividing. If you have an image called ImageA and add to that a completely black image of the same size called ImageB, you end up with the same original image; ImageA + ImageB = ImageA, because you have added nothing or zero to ImageA as in 1 + 0 = 1. If you divide an image by 2, you end up with an image that is half as bright.
If the pixel values of an image are displayed with software that allows the details of the image to be inspected, the pixel values associated with the red, green and blue fields can be seen. The red circle in the left image shows the region of the pixels being inspected in the right window at the transition from sky to the stone wall. The pixel values in the image can be seen to transition from larger to smaller numbers as the image goes from a brighter to a darker region. Although this appears to be a gray-scale image, it is actually a RGB colour image as can be seen by the different R, G, B values at right.
The coding language Processing makes it very easy to load and manipulate images. Processing has a function called tint() which allows the colour and transparency of an image to be changed. When this function is called, two numbers (called parameters) can be passed to it. The first parameter is a number to set the colour and the second is a number to set the transparency of the next image that is to be displayed. Both parameters have permissible ranges from 0 to 255. Here, we won’t change the colour (the first parameter), but only the transparency (the second parameter). So, if you call the tint() function before displaying an image, you can change the transparency of the image that is displayed next. So the code snippet:
  tint(255, 255);
  image(ImageA, 0, 0);
first sets the transparency to ‘no transparency’ (a value of 255) and then displays the image ImageA at the x and y coordinate positions of 0, 0. The code snippet:
  tint(255, 127);
  image(ImageA, 0, 0);
sets the transparency to 50% (a value of 127, which is half way between 0 and 255) and then displays the image. Running or executing those two pieces of code gives the following two images:
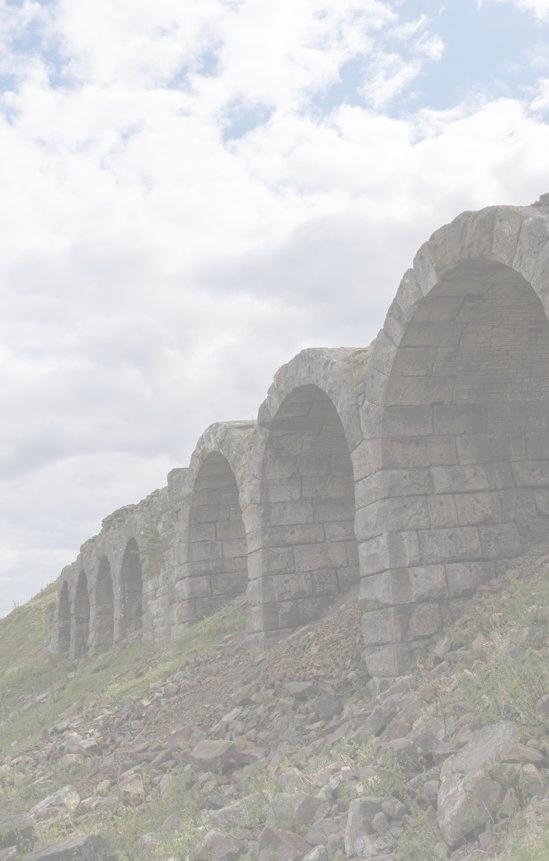
On the left is an image displayed with transparency set to a value of 255 (no transparency) and on the right is the same image displayed with transparency set to a value of 127 (50%).
So, knowing this, it now becomes possible to think about how to make an animation. First the old and the new images must be loaded. Then one of them is displayed with no transparency. Then the second image is displayed over the first image with the transparency gradually changing. The following is the full Processing sketch (the program) that does this and below that is the animation that this creates:
// Text after the // characters are comments that the program ignores
// Comments are useful to describe what the code does
// This script loads the old and the new image and then displays
// the old image on top of the new image with a changing transparency

// first declare the variables to be used in the script
var Ia, Ib;  // declare 2 variables to hold the images
var trx, counter; // declare the variables to change the transparency

// The setup function runs just once to set things up
function setup() {
  createCanvas(549, 861); // create a canvas the size of the two images
  // load the two image files into the variables Ia and Ib
   Ib = loadImage("before.jpg");
   Ia = loadImage("after.jpg")

   trx = 1;  		// set initial value for the transparency
   counter = 1; 	// set the transparency to increase
}

// The draw function runs repeatedly forever...
function draw() {
  tint(255, 255);  	// set transparency to 255, i.e., not transparent
  image(Ia, 0, 0); 	// show the first image with no transparency
  tint(255, trx);  	// set the transparency to the value of trx
  image(Ib, 0, 0);  	// show the second image with the set transparency
  trx = trx + counter; // change the transparency by 1 for the next time round
  // if the transparency has reached a maximum or a minimum value
  // then change the sign of the counter (|| means or)
  if ((trx > 255) || (trx < 1)) {
    counter = counter * -1;
  }
}
There, that wasn’t too difficult then, was it? Well, yes, there is a little to learn along the way, but at least the code is in the English language and can be mostly understood by reading through it, with some help from the comments. It is really only a few lines of code that are needed to do this and Processing makes this relatively easy to do. By the way, it is in fact exactly that same script that is running this automatic animation on this web page. That’s another amazing thing about Processing, it will actually allow code to be run on a web site.
This is the automated animation in which the transparency of the original image is constantly and progressively changing from 0 to 255 and then from 255 to 0.
Here is a link to the text file animation01.js of the full automated Processing sketch.
However, this was not quite what Tom was after. Tom wanted an animation that the user could control with a horizontal scroll bar where if a user moves the scroll bar, the images will transform from old to new. The idea was to have an interactive application so the user can change the mix of old and new in the animation. With what we’ve learned above, it’s not too difficult to understand conceptually how one might go about doing this. In the script above, the transparency is progressively changed from 0 to 255 by progressively adding 1 to the variable trx and then changing from 255 back to 0 by progressively subtracting 1 from the variable trx as the draw() function is executed over and over again. To meet Tom’s specific project brief, the user must control the transition. That can be accomplished by creating a horizontal scroll bar across the bottom of the canvass on which the images are displayed and then if the scroll is all the way to the left, this sets the transparency value to 0 and if the scroll is all the way to the right, this sets the transparency to a value of 255. We know how wide the image is (549 pixels), so that is the width of the scroll bar and so when the scroll is at a position of 549 the transparency must be 100% of 255. If the position of the scroll on the scroll bar is set so that the proportion of the variable trx is 0 when the scroll is at the left and 1 when the scroll is at the right, then we can multiply 255 by that proportion ranging from 0 to 1. So the code for that is simply:
  // calculate the transparency - a value between 0 and 255
  trx = (255 * (barPosi / barWidth));
where the variable barPosi is the position of the scroll bar and barWidth is the width of the scroll bar (549 pixels). Processing makes it very easy for the code to get the barPosi from the mouse position on the canvas. This can be done with the statement:
barPosi = mouseX; // record the current scroll bar position
The animation is then simply created using the following code snippet:
  barPosi = mouseX; 			// record the current scroll bar position
  trx = (255 * (barPosi / barWidth)); 	// calculate the transparency
  tint(255, 255);  			// set no transparency for first image
  image(Ia, 0, 0);  			// show the before image
  tint(255, trx);     			// set the user controlled transparency for the second image
  image(Ib, 0, 0);  			// show the after image
When this code is executed over and over again while using the mouse to move the scroll bar position, this creates the user-controlled animation to meet Tom’s brief. There is a little more work that needs to be done to set up and draw the scroll bar and the scroll and to make sure that the animation only responds when the mouse is on the scroll bar, but that is all just basically house keeping.
Scroll the scroll bar left and right to change the transparency of the original gray-scale image.
Here is a link to the text file animation_ps.js of the full Processing sketch with the slider.
While the miners and engineers building and working the Rosedale ironstone mines, railways and roasting kilns might have been amazed by every step of this process, it is not and should not be amazing to most of us because there are so many examples of this all over the place. Animations, cartoons, videos, morphs are nothing new nowadays. However, what I think is amazing, and this is the real opportunity here, is that it is now, in this era of the Fourth Industrial Revolution, possible for virtually anybody to learn how to do this, to actually do it and to get involved in doing things like this. Processing is just one example of open-source programming language software that is available to download for free (they do appreciate a donation, though) or even to run right on websites without the need to download anything. Free Processing Apps can be downloaded onto smart phones, tablets or computers. There are tutorials, video, instructional resources, blogs and virtual chat-rooms and loads of example code freely available all over the internet that can be copied, pasted and modified. There is an opportunity for anybody to get involved in and to become an active participant in this Fourth Industrial Revolution and the Maker Movement. Having interests and skills such as these allows for interesting hobby and learning activities, work experiences and even volunteering opportunities. I taught myself computer programming (as it used to be called, or coding as it is now called) a long time ago when it was less accessible than it is today, but it has provided many opportunities and interesting projects. I would never have guessed that I would end up using my programming experience to morph old photos into new photos from relics of the Rosedale ironstone industry, on a webpage as a volunteer for the Land of Iron project.
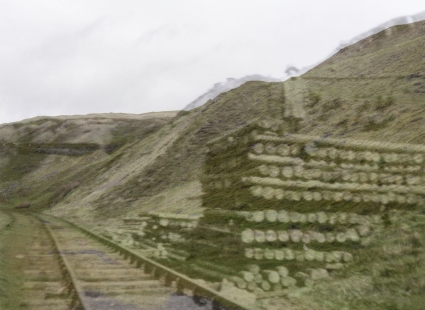
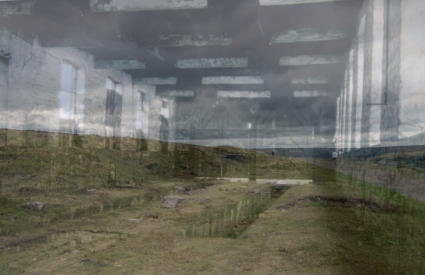
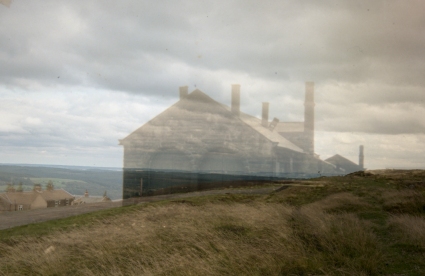
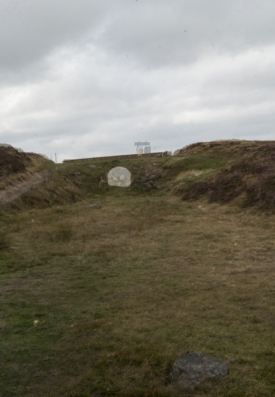
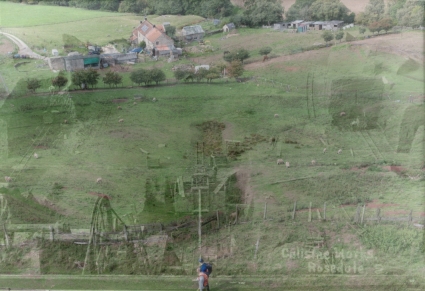
Here below are some other user controlled animations of other scenes from the Land of Iron project. Click on the images to get to the individual animations.
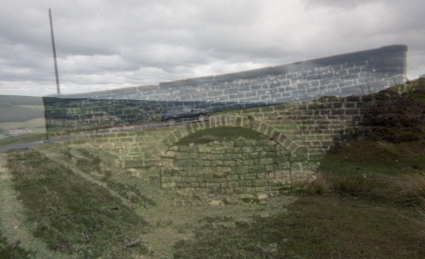
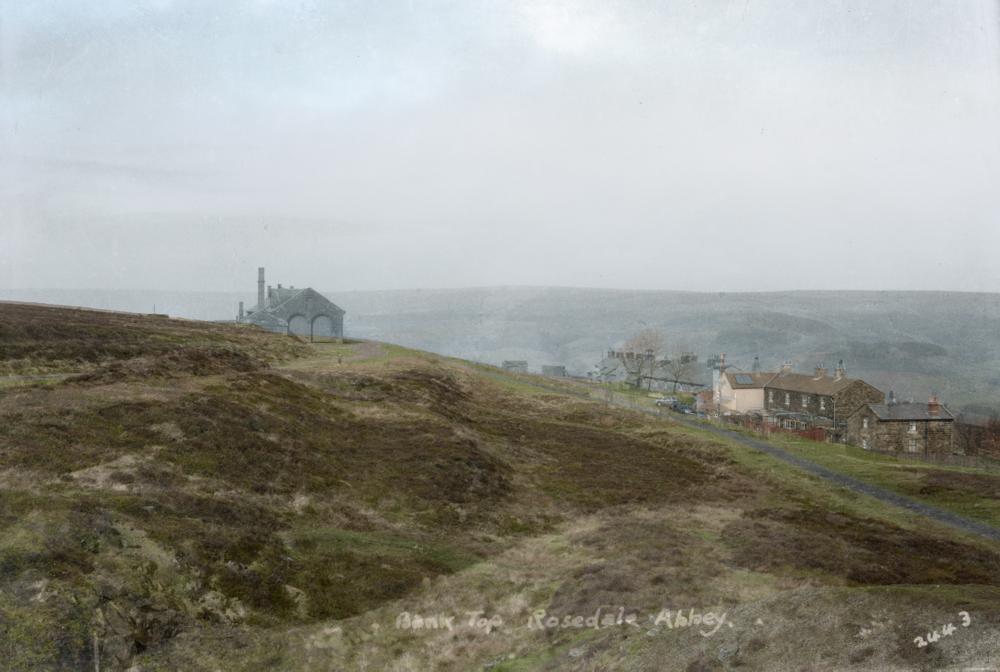
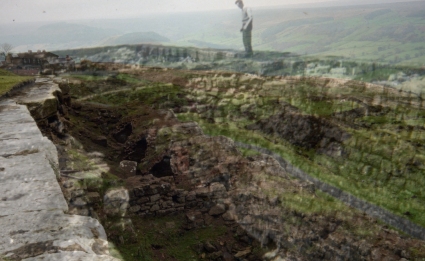
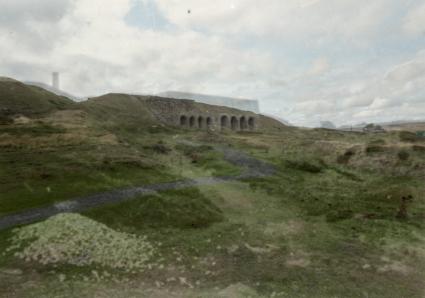
Time Sliders
Bank Top Bridge
Bank Top Cottages
Bank Top Inside
Bank Top Long View
Bank Top Shed Inside
Bank Top Shed Outside
Blakey Bridge
Calcine Works
Grosmont Village
Iron Kilns
Rosedale Props